Pages

Tuesday, November 25, 2014

Taking a Modern Turn

Hi friends. Isn't it funny how ideas can morph and change?  I was losing sight of the fish market and sushi bar. I couldn't really picture the finished product, so I was considering scrapping that idea.

Thanks to Pinterest, I was pinning all these sleek modern architectural houses. It finally struck me to just go modern. Drop the fish idea and do it.

I started sketching the basics of the building. I penciled in the bricks and horizontal wooden siding and I knew it was right. I could actually picture the finished house in my mind's eye. It was going to be beautiful!

Last weekend, I got busy. I got out the Dremel saw and cut out the new entry door and kitchen window on the side was that was previously solid and plain.


I wallpapered the entire bedroom in a fantastic espresso brown damask scrapbook paper. Matching the seams was pretty easy on this room.

I even finished the flooring in both rooms, too. Espresso stripe in the bedroom and black and white check in the main room.


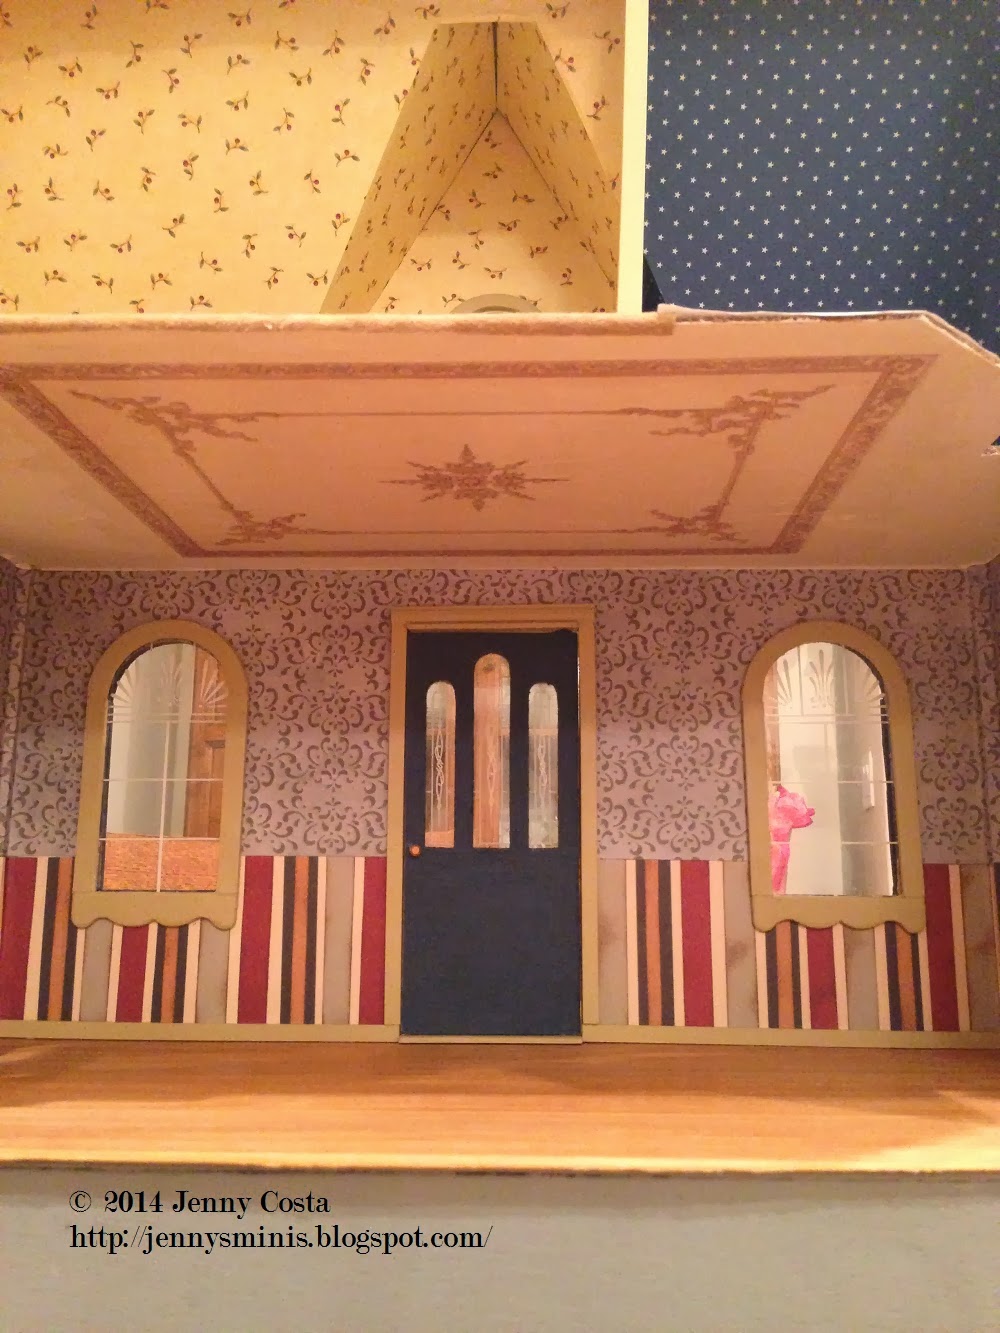
I had to let things dry, so I came back to do the wallpaper in the main room another day, I used this great gray and yellow damask.


This is where I stopped. I have a gray-on-gray stripe for the back wall to accent the huge windows. Yes, they will look like glass garage doors when I'm done.

I also picked up some fat quarters of gray and yellow fabric from Windy Moon Quilts on Pyramid Way.  I'm saving it so I can custom-make some modern furniture. I'm planning on making a couch and armchair. I'm also starting to plan the bedroom furniture.

One of the things I had to come to grips with, was if I was going to make a bathroom or not. In this case, the bathroom is not included. I'm telling myself that it's in the "other" part of the house, you know the part that doesn't really exist.  But I can imagine that it's sleek and modern too. Oh, that gives me another idea for a bathroom room box. (shush, you crazy ideas!)

I've been eyeballing a sleek modern compact kitchen from ELF Miniatures.  They even have tiny color coordinated blinds for the kitchen window! I think this house deserves a nice espresso machine and an orchid on the counter.

Well, that is all for now. I will keep you posted as things progress. See you soon!


Wednesday, September 17, 2014

Sunny Miniature Quilt

Hello friends! I have been very quiet lately, lots going on. The kids are back in school which means homework, field trips, and football practice. I started,  and have already finished, a new cross stitch project. You know I have been on a quilt kick.

I was inspired by sunflowers. We grew some in the garden this year, so they were just outside the back door whenever we looked out. I charted some simple little blocks and tweaked the colors to be sunny. Then, on August first, the first night of football practice, I started my stitching.

After two weeks, I had this much done.


Ten days later, I was up to here. This was a slow stretch, but no giving up. I finished all the yellow, then went back and added the brown. Much more efficient that way.


Then I had all the little fussy little leaves to add. And I lost my favorite needle. I had to buy new needles, two different packs to test them out. All of them pale in comparison to my old needle. Some were too fat, some too short, but all were stamped weird so they were hard to thread. Bummer.

So here is the top. I still need to get some backing fabric and finish it.  It's small, not bed size. It's more like a wall-hanging art quilt. It's just a tad too big to be a half-scale quilt. The stitched area is about 3.5" square.


Now, I need to wash it, iron it, cut it out, find some backing fabric, sew it all together, and then it can be done.  In the meantime, I'm ready to start another quilt project. It's nice to have a portable project that goes to practice!

Thanks for stopping by, my friends!

Wednesday, July 16, 2014

New Cross Stitch Patterns

Hello friends.  I decided to branch out and try something new.  Since I'm a little bit good at cross-stitching (being modest here) I thought I'd try out making some patterns of my own.

I bought some software and I've been absolutely bonkers making up patterns. At this point I've made so many patterns, I will never ever have enough time to make them all. Ah, to dream happy little project dreams.

At the moment, I have two patterns for sale in my Etsy store. These patterns are meant to be "quilts" where you stitch the top and then sew a backing on.

First, is the simple blocked baby blanket. (If you'd like to buy the finished blanket it's also available here.)

https://www.etsy.com/listing/191471742/baby-blanket-in-112-miniature-cross?ref=shop_home_active_2

Second, is Haley's Heart quilt.

https://www.etsy.com/listing/190156108/heart-quilt-112-dollhouse-miniature?ref=shop_home_active_1
I have a bunch more patterns in the works. If you have any suggestions, I'm open to them. Thanks for stopping by!

Tuesday, June 3, 2014

Orcara Miniatures

Hello friends!  I couldn't help it. I bought another Orcara set off eBay called Cooking with the Master. It took forever to get here from Hong Kong. It was so slow, I think someone swam across the ocean with it instead of putting it on a ship.


But it was here! I was super excited to open it. I didn't have a chance to open each little thing, just enough time before bed one night to make sure it was the right set.

Then, the next night, without my knowledge, Haley got out the scissors and opened everything herself.

I was really disappointed. The little kid in me wanted the joy of opening everything. You don't get that much as an adult. So, it's not the end of the world. She didn't mess up anything, but jeez I waited a MONTH and didn't get to open it. Boo.


So I did the next best thing crazy busy people do. I set it aside in the closet until I forgot what was in it. And THEN I opened it up to see what I had!


The set is cute, lots of kitchen goodies. A toaster oven. Bread. Pasta. A blue Le Creuset style pot of spaghetti sauce. Coffee. Salad. Mucho Cuteness! Haley and I played together with some dolls and the new goodies in the Barbie kitchen.


I'm starting to think about reclaiming my old Barbie kitchen set and getting Haley a different kitchen. I really like my old Barbie kitchen. (That's why I kept it!)   I can picture all this cuteness together in a room box, a playscale kitchen full of baking. I certainly don't need another project, but the kitchen minis are calling me!

Monday, May 12, 2014

Another Change Midstream

Hi Friends!

I think I must have a touch of Spring Fever. I've been excited to go outside, until I get too hot in the sun.  Then I'm back inside staring at Haley's house. I've had another idea to change things up.

I've been thinking about the bathroom. Where I wanted it and how big it should be.  I taped up the house so I could see how the rooms look with wallpaper. I had some wood scraps I used to help identify the bathroom's location.


Eric is the one that had the best idea.  The house has an access bay that opens up on the house's side. He pointed out that the bathroom would fit perfectly there.  I had to show Haley and get her input. She liked his idea, so that's my new direction.


I will need to make the two walls and another door now, but we will have a real bathroom! I think the other side will make a great reading nook for the rest of the bedroom.


Now, I can mark these new walls, and get back to work!


Saturday, April 26, 2014

Farmhouse Wallpaper Pt.2

Hello again, my friends. I've been making more progress on wallpapering Haley's house. It's so nice to see something accomplished.

We decided that the kitchen and bathroom need extra windows on the side wall, so no wallpaper on those walls until the window holes have been cut. I did start papering the left side of the kitchen. I used some of the green stripe Itsy Bitsy paper. This was the paper that irked me when I bought it online. They sent me two pieces from two different batches and the colors were slightly off. But, I'm putting them on opposite walls in the kitchen so the color variation won't be noticeable at all.

I also glued together the wall for the dining room where it joins the kitchen. I had to sand it smooth before I applied the next piece of wallpaper. Justin helped me hold the walls in place and outline where they go on the floor so I can also start to plan the flooring.


I started to go around the dining room with the hummingbird paper. I like it.  I was originally thinking of using it in the living room, but I think the swag stripe paper looked so much better there.


The room above the living room now has paper. It's pink of course, but not the pattern I originally picked out.  I was disappointed that the sheets of paper from Itsy Bitsy are smaller than Brodnax or Minigraphics. The sheet was too short to fit the entire wall without needing a strip from another, and the pattern would have been a bear to match up and make a clean seam. Even though a sheet of paper is "yay-big", you have to subtract the printing bleed area. So, that plan got scrapped and I used something else! It looks really good though, so I'm happy with the result.


I've also decided to change the door to the upper deck, again!  I originally wanted an oval light door, but now I'm thinking of a single French door. Details, details!

Haley has also requested a sewing room.  I think the attic will be a good place for that. If the wall spans are smaller, I will use the cast off Itsy Bitsy pink damask wallpaper from the first bedroom here. I think I will need to get something else as a back-up plan, just in case. Or possibly use wainscoting, if it looks better that way.

By the way, the decoupage glue isn't perfect, but I'm getting better results as I work through the house. I think my glue-brushing and paper-laying techniques are getting better. Also, if the paper starts to bubble or buckle, I use the blow drier to help it dry and shrink back while gently rubbing the bubbles out.

Now, before I go let me just say a quick hello to my new followers. Thanks for joining me and it's so nice to see what you all are creating too!

See you again real soon!

Tuesday, April 1, 2014

Farmhouse Wallpaper Pt.1

Hello again friends.  I've been a busy mama so I have been extra slow at making progress on Haley's house. I managed to get the foundation set up.  All the exterior walls were painted smooth. Then things came up and the house got moved to the other room (the room of exile?) so it was out of the way.

Dear hubby had a great idea to clean the garage and make a work table for the boy stuff, with the promise of helping me make a dedicated spot for minis. The garage is now really tidy, but there was no space for minis there.

Back inside, the dining room table kept calling to me, but I wasn't sure if it wanted real food, like meals, or to be covered in dollhouse parts!

Of course there are other projects that come up and they get priority over the minis. So every night I have been wishing for a chance to work on the good stuff once the boring stuff is done. We've done a little here and there. Justin set up the saw so we could cut and patch the new upstairs front wall. He cut the door opening bigger for the new front door, too. I had to patch the gap above since the new door is shorter than the original hole.


Not perfect, but this won't be visible behind the front door's top trim, so it's good enough.


 This patch on the upstairs wall will be visible so I patched, sanded smooth, and painted until it was perfect.


Yesterday I managed to get something accomplished! I had a furlough day and wanted to make the most of my time off.

I worked on the first bit of wallpapering. I tried some real wallpaper paste from Lowe's. IT WAS HORRIBLE. It just didn't want to stick and yes the surface was clean and smooth. Yes, I put it on nice with a roller. Yes, yes, I did all the right things and it was still horrible. Plan B was to resort to decoupage glue applied with a paintbrush. That worked much better!


After I let the glue dry, I trimmed all the door and window openings with an X-acto blade on my cutting mat. I had try it out with the big front door so see how it would look. This is really going to look good!


The living room now has wallpaper. I also have a fantastic plan for the big door opening on the side wall. It's going to become a floor-to-ceiling fireplace! I even made a sketch!


My next room to paper will probably be the bedroom directly above the living room. Then I'll maybe take on the kitchen and dining room. That will take some really creative assembly because there are tiny walls that need glued together to make the span.

It's so exciting to see something besides plain wall! See you again real soon :)

Friday, March 21, 2014

Cake and Tea for Two

Hello friends! I have something new to share.  I've been working on a shabby tea set. I was thinking of something fresh and summery.


I built and painted the furniture bright white and added the blue and yellow check fabric. I had to think about what else would be cute and tea party appropriate. So I added strawberry cupcakes, napkins, plates, and the cake stand.
 
I need to make up a few more things, like the cups, a teapot, maybe a doily or table runner, and a centerpiece. It's a work in progress, but it's coming together. Doesn't it look nice?

Monday, March 3, 2014

More PB style bed

Hi friends!

I hate it when I get clumsy.  Clumsy happens and it sucks. I was getting the Pottery Barn knock off bed out to give it a fresh coat of paint when I dropped it.

The headboard came off the rails.  At least it was a clean break at the joint, so it was easy to fix. I got it re-glued and managed to give it some more paint yesterday.

This paint job is so much better!  I even sanded down the edges to give it some wear and tear aging. I really like the ivory paint this time around. I'm considering just how much wear and tear I want. Maybe just a little. It is still a work in progress after all.


I'm not sold on the blue ticking stripe mattress. I might have to change that to red so it's more matchy-matchy with the redwork dahlia quilt. They clash when I turn down the quilt.


I have some solid red cotton and more of the red ticking stripe to work with. Maybe solid ivory sheeting?  What do you think?

By the way, I still haven't finished the dahlia pillows. Maybe when I nail the sheeting, I can finish the pillow backing.

Thanks for stopping by!

Saturday, February 15, 2014

News for Now

Hello again, my friends. The weather here has been amazingly warm for February.  I was expecting more cold, dark evenings which are perfect for staying warm by the fireplace making minis.  Instead, we've had sunshine and weather in the 50-60s.

The boys have been in love with the new RC cars. Justin has made some ramps in the backyard and strategic rock piles for climbing with the cars. He's has even ordered a bunch of new aluminum parts to replace the broken plastic factory parts.  The Axial Wraith is getting red and orange new parts. They even have a plan to change out the body for a custom painted one with a 49ers logo and flames. I'm not sure what they have planned for the Vaterra Twin Hammers. It's been out of commission. They've had issues with the battery charger not charging. I think it's defective.We even made a special trip to Carson City's hobby store to get a new one. No luck there, though.

Anyhow, I've been trying my hand a few new things as well. I posted a few things on the Greenleaf forum, but I will share them here too.

I've been working on a scratch-built bed to go with my redwork quilt. Together, it looks like something straight out of a Pottery Barn catalog, which is what I was going for. I had the bed assembled, but the paint wasn't behaving so I took it apart. It will get re-painted and reassembled now. Here's before it was painted.


Of course I love my mini kitchen stuff, so I've been making some kitchen utensils. I've made some whisks, mashers, wooden spoons, pastry cutters, and a big strainer. Eventually a few sets will show up in my Etsy store, and I've even been thinking of doing a giveaway. Here's a shot of a few things to give you a taste.


I'm still working on Haley's heart quilt. I was hoping to be almost done now, but I was sick last week and spent three days home from work. My head cold was so bad, I couldn't even see well enough out of my watery eyes to cross stitch.

My poor head has been brimming with ideas for other projects, too. I keep telling myself not to get distracted from things I've already started. Must. Finish. Something!

Good luck out there. Stay warm (if you're in the East Coast freakish snow zone) and I'll see you again soon.

Saturday, February 1, 2014

Little Red Cottage Touches

I haven't posted anything on the red Lafayette dollhouse in quite a long time. That's mainly because I haven't done much to this house in a long time. I figured I had to finish it before moving on to Haley's house instead of letting it continue to linger. Here are some details to the finishing touches. I'm not 100% finished, but I'm so close I couldn't wait to share these photos.

Cape Cod Nantucket house
  
I bought some plain 3/8" basswood strips and used that to enhance the exterior trim and also inside around the door and as floor molding. I painted it the same tan as the interior window trim before gluing in place.


The door was a huge pain to get in place. It took tons of sanding and grinding with the Dremel tool to make it work. I added a brass doorknob. I had to enhance the exterior trim (the pediment?) so it wasn't so plain. Also, the shutters were so plain and blah, they needed something. I used crackle medium to get some variation and texture. That also helped them to match the door.


Inside, I added trim around the bay window inside to hide the transitions between wallpaper and paint.  It was a huge improvement.


I figured out what to put on the downstairs ceiling to give it a little something extra. I scared up a printable rug and ran it on the color laser printer at full page size. It was perfect! After a little dimensional glue and decoupage, it really completed the scene.


Now, there are only a few minor things left to do.  I have some fabric saved to use for curtains. Then, I need to finish up the front porch steps and the spiral stairs. This little house has really turned out well and I'm so pleased with it.


Saturday, January 25, 2014

Farmhouse Wallpaper Mania

Hello again, dear readers. The family took a little trip over the MLK holiday weekend down to the Bay Area.  We stayed with the hubby's brother and had tons of fun.  We tracked down a few stores we had to go to, for Justin that meant RC hobby stores and for me, Shellie's Miniature Mania in San Carlos!

It's been years since I've been to a miniature store.  The Reno store shut down right after I graduated from college when the owners retired.  Another store popped up but quickly went under. Mini-lovers are at a loss around here.

Can I just say wow? Not that Shellie's store is huge, but there is tons of stuff stuffed in there! I managed to find all the wallpaper I needed for Haley's house, plus some different flooring materials too. I even talked to Shellie herself. This place is on my list for a return visit.

(Mental note: Shellie is working out the details to hold another workshop with Rik Pierce for October 2014.  I'm putting that on my wish list!!!)

We drove around the Bay and I took tons of pictures of cute houses for dollhouse inspiration. San Carlos and Berkeley have the cutest old houses!

The boys were awe of Hobbytown USA in Concord.  Justin found the right things he needed for the Twin Hammers rock crawler.  The boys have been on a kick with pinewood derby cars so I even helped Haley pick one out with some decals so she can have one of her own. Of course, it will be pink, not the red that came with the kit.

Anyhow, once back home, I encouraged the boys to work on one of Eric's RC kits while I messed with wallpaper.  I decided that with this house, I wanted to spray all the wallpaper with sealant before doing anything. I was bit annoyed by the crinkle issues I had with the red cottage, so I hope the sealant helps!

I got out all the new wallpaper and flooring, plus all my old wallpaper and flooring I had stashed away. I spread things out on the floor and looked at it. I started picking what paper goes into which room. The vine one (top left) is for the living room, strawberries (bottom center) for the kitchen. Green stripe with roses (bottom left) is the 2nd floor hallway. I'm still working out other rooms, but it's progress!


I also made another decision regarding the front room. I was thinking a fireplace would be nice. Since I've moved walls around, I have a wall with a door opening. That opening is now going to be the location of the fireplace.  I will still need to fill in the gap (so there is wall to wallpaper above the mantle) but I won't have to worry about matching up siding on the exterior. The fireplace will conceal that area!

I think at this point it's fair to officially rename the house. I've made enough changes that it doesn't look like the box. It's no longer the Victoria's Farmhouse. I will officially call it Haley's Farmhouse.

Thursday, January 23, 2014

Heart Quilt Sneak Peek

I started another little cross stitching project at the end of summer. Once I finished stitching the red dahlia quilt, I immediately started a new one. I found some very pretty heart fabric at the store so it was my inspiration for this quilt.

I already had a white wire bed frame and pink mattress for Haley's Farmhouse. That bed needed some covers on top. I made up this pattern. Hearts, lots of hearts, and they had to be in shades of pink to match the fabric. I even have some pretty pink wallpaper that will look great with this.


To work out the pattern, I printed out some 22-ct. scale graph paper and messed around with colored pens. I practiced a few other things too but those are saved for another project.

I'm moving slow on this, mostly stitching during break time at work or when we have quiet time. I did a little bit at the cabin in Incline Village at Christmastime and a little last weekend in the Bay area. I'm roughly halfway.

This is stitched on 22-ct ivory Hardanger fabric. I'm tired of this material now. I had a scrap left and wanted to use it up.  It has an awkward weave that slips stitches a lot.  My next project will definitely use different material!

Tuesday, January 7, 2014

Farmhouse Foundation Assembly

After a very long hiatus from working on houses, I've picked up where I left off with Haley's dollhouse. That  means, assembling the foundation and making some firm decisions on the interior.

First, I've decided to make some pretty significant changes. This was the step that had me hung up for so long. Do I follow the original plan or get creative? I showed Haley her choices and now I can move forward. Thankfully, she's also at an age where she knows what she wants and can tell me. Here is a nice sketch of the house.


 I took over the dining table and started to assemble the foundation.


We're opting to take a wall from this years' RGT Build-along kit and swap it in for the front door. This will make the room wider than what the original wall allowed.  I still have to cut the door opening to fit the fancy door with sidelights. Then, I need to change the wall upstairs to match the new width. The porch on the side will be more narrow, but I'm also thinking about adding a fireplace. There won't be much porch left after that.


Upstairs, there will be a door from the hallway onto the upper porch. I'll have to chop up the original walls and remake them to fit the door and the double window. I'm planning on altering the trim and finishing for the gables. The original Victoria's Farmhouse trim is too plain. Fish scale shingles and gingerbread trim are coming to mind. I want it to be Victorian frilly and girly and Haley wants it pink pink pink. I already have colors picked out so it will be pink but not garish like a Painted Lady.

I'd like to stick to a color scheme for this house, so it's more uniform and easy to switch furniture from room to room. The main exterior walls are all painted, except for the bay window parts. Now, I must choose some wallpaper and flooring before I start putting any walls up. I sifted through my huge stash of wallpaper last night, but I need to go (online) shopping for some more.