Pages

Tuesday, September 11, 2012

Log Cabin Assembly Part 4

It's been a busy summer for us, so I've spent the last two months mostly ignoring the cabin project. That is, until this past week, and I've kicked it into high gear!

I sanded and sanded and sanded. I decided to install the floors with the flat side up. I got the main floor installed one evening, then the front porch the next evening. The following evening, the second floor went in. I was on a roll!


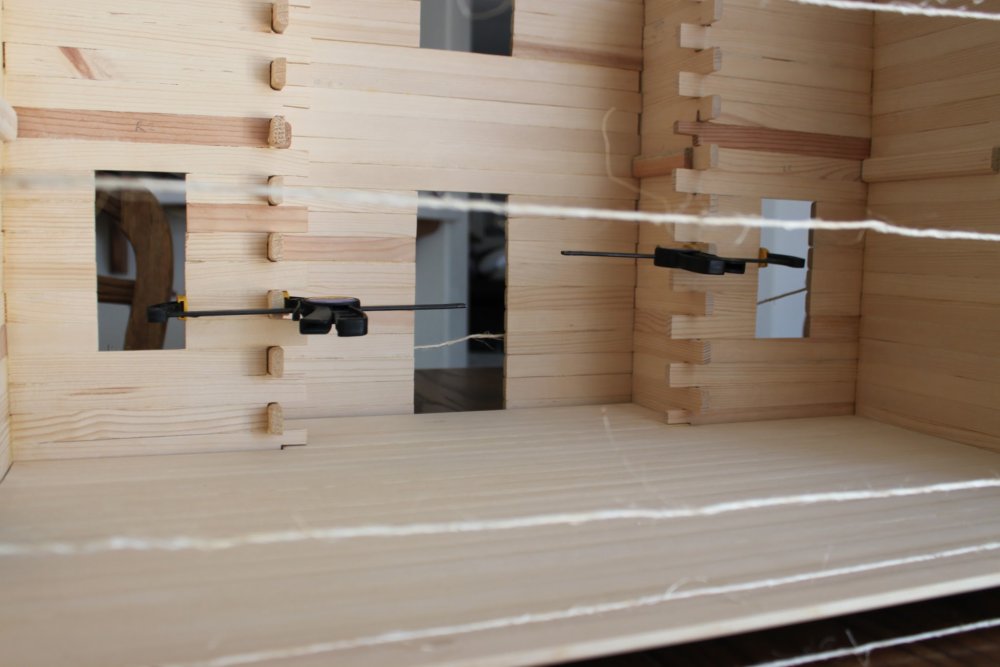
Since this cabin is pretty large, we got out one of Justin's big clamps, plus the smaller clamps I love and the twine to really tighten joints up and keep things together. I used mostly wood glue, but I also used Justin's gap-filling CA glue on a few odd spots.


Just a note, if you happen to glue your fingers together with superglue or CA glue, nail polish remover that contains acetone will break it down. Yes, I did get glue on my fingers and sort of glued them into a really weird position.

Anyhow, Eric is pretty happy that I'm working on this again. He asked if I was going to paint it black and if I could put a Batman emblem on the front.

Sorry kiddo. Not what I had in mind.

I went back to the plan to see what was next.  I was hoping it was the roof. However, I forgot about the little 1" wide back walls. The last 3 days I've been gluing, sanding, and more gluing the little 1" and 2" scrappy pieces together in place.


Coming soon, the main roof, also the porch supports and porch roof. Assembly is nearly complete!

Tuesday, July 10, 2012

Log Cabin Assembly Part 3

To connect the front walls and side wall assemblies, I had to get faster with the glue. No dilly dally!

I started out by fitting everything together. It was not perfect. There are a few gaps here and there, but I wasn't ready to crack things apart so I could try to get them perfect.  Perfection was not happening.

I used a small paint brush to paint the wood glue onto the areas that would touch and be glued.


I squished everything back together. The floor is in place but not glued at this point. I wanted it there to keep the walls square.

Then I clamped here and there, and finally used twine to snug up things together.


My son thought the twine was an awesome addition to the fort. He said it was an electric fence. He also said it was a good idea to keep out the bad guys, like the bad ninjas.


I love his imagination!

Wednesday, June 6, 2012

Log Fort Assembly Part 2

After many little things have come and gone, we are back to making (slow) progress on the log cabin.

I swear, even using good wood glue and clamps, these wall will just crack apart if you look at them the wrong way. The kids really want to help, so I let them hand me things so they don't get messy from the glue.


I had to repair the walls a few times before we could actually interlock them to glue them together. Then during the interlocking and gluing step, I had one of the smaller front walls come apart. I'm sure this will happen again and again before I'm done with the whole house.


Justin came up with a clever way to square up the walls and hold them together snugly while waiting for the corners to dry. He used twine to wrap the side walls a certain way. I can't really describe how he did it, but it worked. If you look closely at the photo below, you can see the twine still on one side wall assembly.


 Coming next, interlocking the front with the sides! Then after that, installing the floors and gluing them into place.