Pages

Showing posts with label Shenandoah. Show all posts

Saturday, May 11, 2013

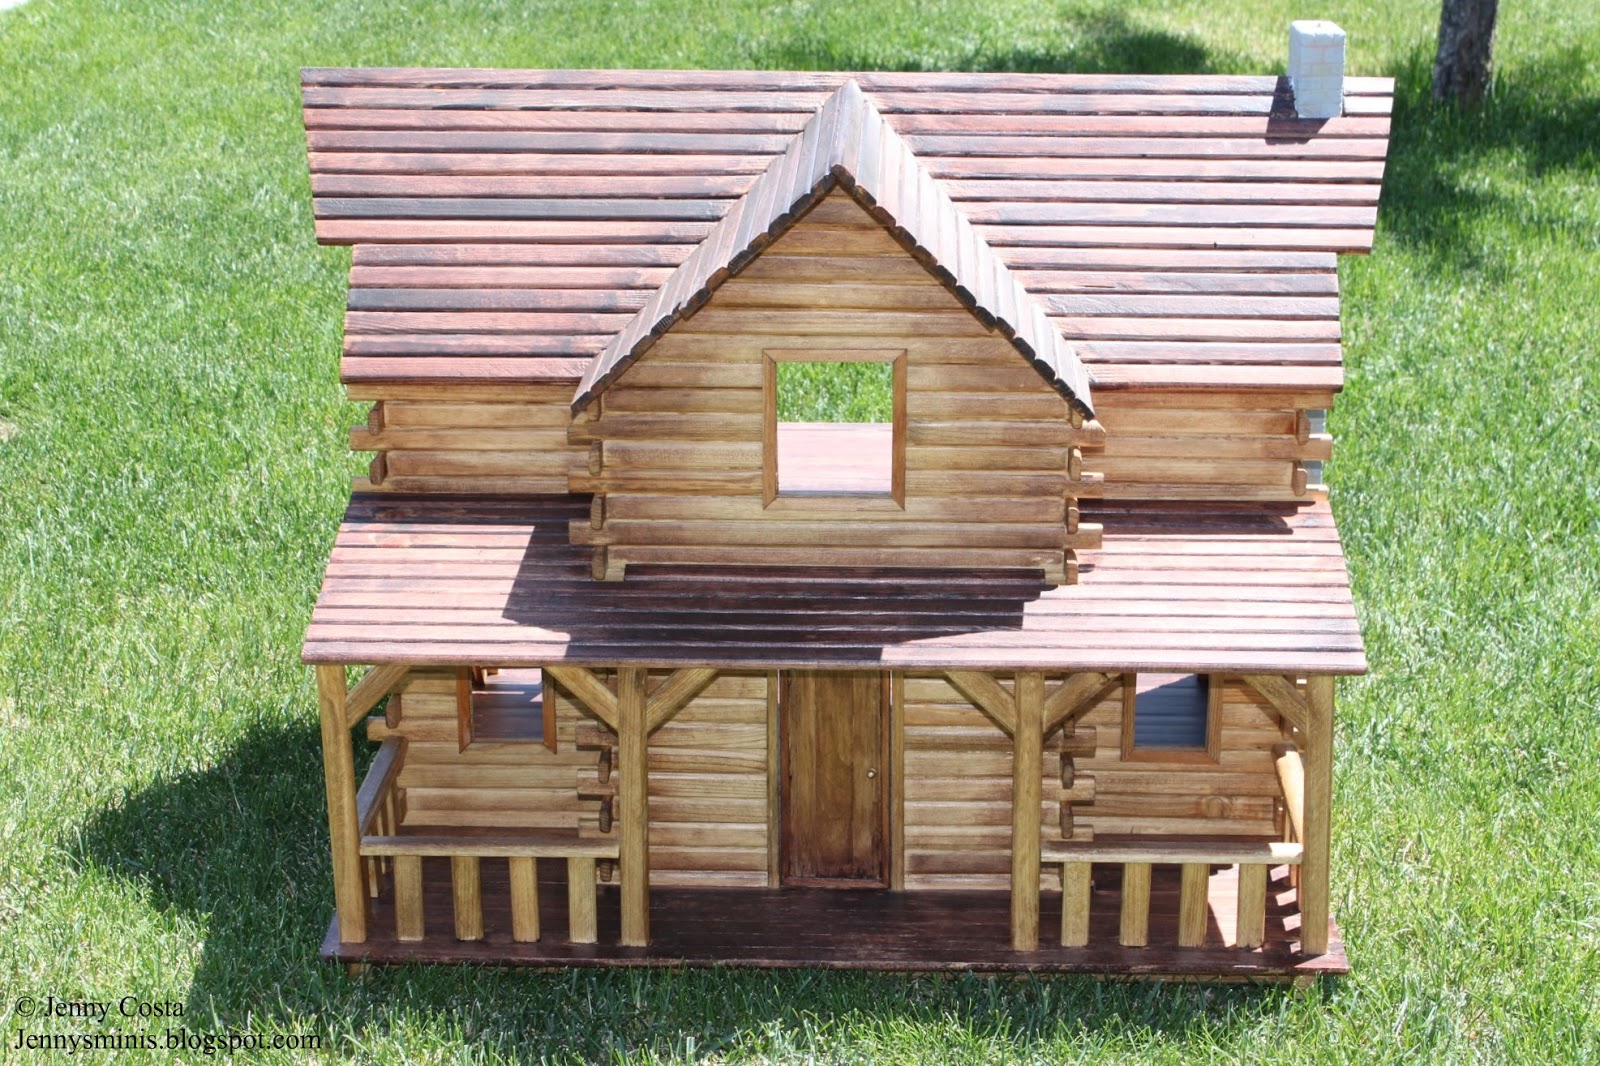
The Finished Log Cabin


Wow, it's almost been exactly one year since I started to rehab the Shenandoah cabin kit. It has come a very long ways from broken pieces in a box to this. I got it done just in time for my son's birthday. He was quite happy to call it his and put his new Lego Hero Factory characters inside it.


 Let's catch up on the finishing touches.

I sealed up the stained wood with some oil-based satin finish polyurethane. One coat was not enough, so I lightly sanded and applied a second thin coat.

I managed to get the door installed with some help from my Dremel and a nice little drill bit. The kiddo requested a shiny gold door knob. I made the set from two round glass beads, smooth sequins, and jewelery pins glued together with CA glue, then painted with gold nail polish. Maybelline Bold Gold #70 was perfect, not too brassy, and little aged looking.


The fireplace shell was the stock plywood. It had broken at some point and even after trying to glue it along the break, it was just bad, warped, splintery, plain.  After some careful gluing and clamping to fix the shape, it ended up being a decent base. I'm testing the fit here. It's good!


The inside of the fireplace was made from brick-sized pieces I cut from rough Chinet paper plates. I painted it blotchy gray and tan. Next, I smeared hole filling compound stained tan (with craft paint) into the crevices like grout. Once dry, the fireplace shell was glued into place.


I rolled out paperclay, applied tacky glue to the wood, and laid the clay on top. While wet, I used a toothpick and credit card to carve "stones" into the clay. I had to work in segments and mind the seams.


After it dried, it looked really great. A little X-acto knife trimming here and there tidied up the edges and some of the lumps. I painted it dove gray and smeared tan tinted hole compound into the grooves for grout.


The mantle was assembled from the log pieces according to the manual. It was stained a dark oak finished with semigloss polyurethane. Then, I glued the mantle in place.


The cabin looks so good, like a million bucks! Now we need to scare up a table so the cabin can live in my son's room. For the moment, it's in the dining room but I hope I can get it moved soon.

Thursday, February 21, 2013

Staining the Cabin

The cabin is completely assembled, except the door is not yet installed. To give it some character, I used two stains for depth and interest.


The two shades of oil-based Minwax stain I used are golden oak and red mahogany. You probably would not have guessed those two colors, but they really look nice together. I used Cabot wood conditioner on the end grain before applying stain.  This really helps keep the stain from getting too saturated on the cut edges. While the wood conditioner is wet, apply a thin layer of stain. Let it soak in a few minutes and wipe off the excess.


To apply the stain, start with the lighter stain for the ladder, the walls inside and out, and on the porch trim. Apply it with a brush and wipe off excess with a rag. Next, apply the darker stain on the roofing and interior floors.  After the walls dry, rub in some of the darker stain using a dampened rag for shading and wear along the outer edges and blend inwards. Also, lightly rub some dark stain onto the porch trim.


Separately, I constructed the new front door out of wood scraps. There are three panels that run the length of the door, with channel molding as the outer frame. My dear hubby helped with the two part epoxy. We used his airplane epoxy to hold the sturdy pin hinges in place. When completely dry and cured, I distressed some areas of the door, then applied stain following the same method as the wall.  I applied the light stain all over.  When dry, I applied the dark stain using a small rag to work depth into the main part of the door. Then, I followed that with a small paintbrush to get "grime" into the corners.


After everything was stained, I went back and sanded. Some areas of the floor received heavier sanding to add wear and tear. I used the Dremel in some places, along the roof and the door opening to fit the door better.

Coming soon, the fireplace and finish!

Thursday, January 3, 2013

Log Cabin's Nearly Done

I can see the end in sight! The finishing touches on the cabin are coming together. Let's catch up.

I assembled the ladder / staircase according to the instructions. It's nice. It works out better than steps made from junky plywood in the same design for inexpensive plywood houses.


The windows all have pine trim. I opted not to use the logs as described in the manual. They were too bulky-looking. Instead, I used a thinner 3/8" trim with mitered corners.  These windows are open without plastic or PVC. The front door opening got the same trim.


I assembled and glued the porch trim and posts. I'm still considering the gable peak trim. I'm thinking about changing the facing trim but keeping the cross-timber design so it's matches the porch.


Coming soon, the front door, the fireplace, and stain. Yippee!

Friday, November 30, 2012

Log Cabin Roof Installation

I had to do the roof in phases. I started with the larger pieces that fit over the main body of the cabin.


I used my not-so-technical system of clothespins to get it in the right place before applying glue.


I applied wood glue and cinched it down with twine.


Afterwards, I tightened up iffy spots with some Zap-a-gap CA glue with a squirt of setting accelerator.

Later, I did the same process for the front gable roofing.


Then, the porch roof and the porch railing on the sides went up. It's looking pretty good!


Coming soon, the ladder, window trim, the door, and the rest of the porch railing!

Tuesday, September 11, 2012

Log Cabin Assembly Part 4

It's been a busy summer for us, so I've spent the last two months mostly ignoring the cabin project. That is, until this past week, and I've kicked it into high gear!

I sanded and sanded and sanded. I decided to install the floors with the flat side up. I got the main floor installed one evening, then the front porch the next evening. The following evening, the second floor went in. I was on a roll!


Since this cabin is pretty large, we got out one of Justin's big clamps, plus the smaller clamps I love and the twine to really tighten joints up and keep things together. I used mostly wood glue, but I also used Justin's gap-filling CA glue on a few odd spots.


Just a note, if you happen to glue your fingers together with superglue or CA glue, nail polish remover that contains acetone will break it down. Yes, I did get glue on my fingers and sort of glued them into a really weird position.

Anyhow, Eric is pretty happy that I'm working on this again. He asked if I was going to paint it black and if I could put a Batman emblem on the front.

Sorry kiddo. Not what I had in mind.

I went back to the plan to see what was next.  I was hoping it was the roof. However, I forgot about the little 1" wide back walls. The last 3 days I've been gluing, sanding, and more gluing the little 1" and 2" scrappy pieces together in place.


Coming soon, the main roof, also the porch supports and porch roof. Assembly is nearly complete!

Tuesday, July 10, 2012

Log Cabin Assembly Part 3

To connect the front walls and side wall assemblies, I had to get faster with the glue. No dilly dally!

I started out by fitting everything together. It was not perfect. There are a few gaps here and there, but I wasn't ready to crack things apart so I could try to get them perfect.  Perfection was not happening.

I used a small paint brush to paint the wood glue onto the areas that would touch and be glued.


I squished everything back together. The floor is in place but not glued at this point. I wanted it there to keep the walls square.

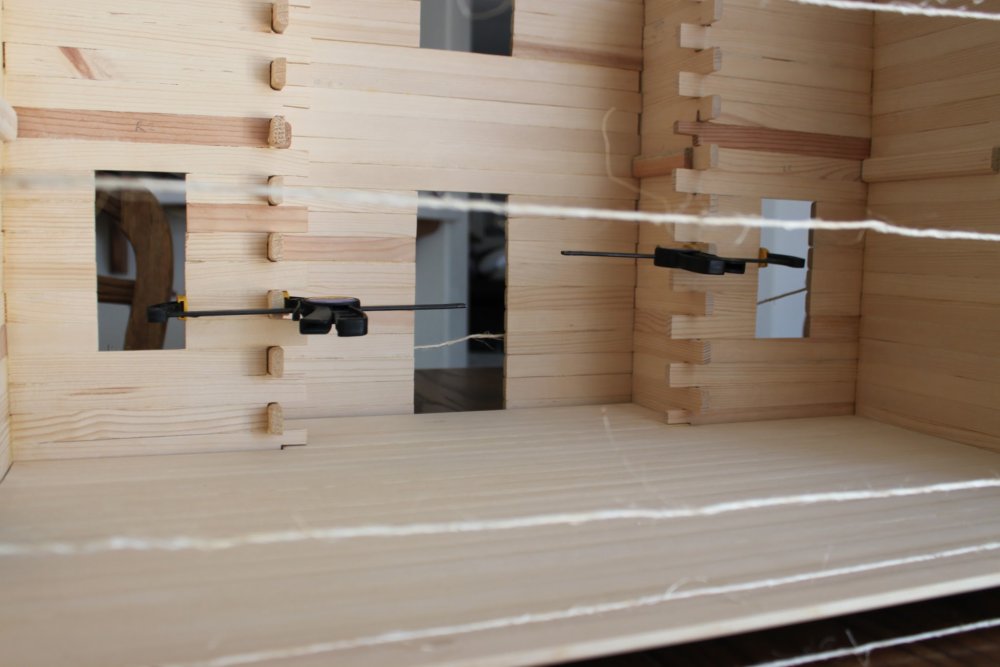
Then I clamped here and there, and finally used twine to snug up things together.


My son thought the twine was an awesome addition to the fort. He said it was an electric fence. He also said it was a good idea to keep out the bad guys, like the bad ninjas.


I love his imagination!

Wednesday, June 6, 2012

Log Fort Assembly Part 2

After many little things have come and gone, we are back to making (slow) progress on the log cabin.

I swear, even using good wood glue and clamps, these wall will just crack apart if you look at them the wrong way. The kids really want to help, so I let them hand me things so they don't get messy from the glue.


I had to repair the walls a few times before we could actually interlock them to glue them together. Then during the interlocking and gluing step, I had one of the smaller front walls come apart. I'm sure this will happen again and again before I'm done with the whole house.


Justin came up with a clever way to square up the walls and hold them together snugly while waiting for the corners to dry. He used twine to wrap the side walls a certain way. I can't really describe how he did it, but it worked. If you look closely at the photo below, you can see the twine still on one side wall assembly.


 Coming next, interlocking the front with the sides! Then after that, installing the floors and gluing them into place.


Friday, April 6, 2012

Log Fort Assembly Part 1

Since we work, we have to find time in the evenings to work on projects.

Slowly, the log walls are coming together. The front wall with the window and door need a bit more work for the interlocking logs to fit. Of course, we've been sanding everything as we fit them together.


 Also, I need to glue on a few support beams for the front porch roof and second floor. We're pleased with the results this far.

Tuesday, April 3, 2012

Eric's Fort

Many, many years ago, I purchased the Shenandoah log cabin kit by Dura-Craft. I got it on clearance sometime around 1998. I started assembling it, and then things happened so I put it away and forgot about it. Over the course of a number of moves, there were a few casualties. Things fell apart, the chimney broke, I lost, then found, then lost again various pieces or the instructions.


This past weekend I decided enough was enough. I told Eric I was going to build him a fort for his superheroes. I tore up the garage to find everything. I spread it on the dining table to see what I had to work with. I told myself I had to get it done in time for Eric's birthday, which was only 30 days away.


See? Instructions!  Everything I needed to find, I found.


Then, I started working on it. I had to identify which broken pieces went where and which wall or roof pieces was which.  It really wasn't that difficult. I started to fit the walls together, which meant sand and trim where the logs interlocked. I was using a little piece of sandpaper, sitting at the table.

Then Justin said, why don't you use the power sander?

Power sander? Good idea!

Before long, Justin was showing me what to do, how to sand it just so, and lending a hand when I got tired.


It's funny how my hobbies and interests take over so even Justin was excited about getting the fort done.We talked about stain, adding "chinking", what kind of stone to use to cover the chimney,  and finishing it with a final clear coat.

We  got to the point of dry-fitting together both the left and right side wall assemblies with the bottom floor. We got a lot done in one lazy Sunday. Progress is so exciting!

For the rest of this week, I will continue re-gluing the front wall and roof sections, sanding, and fitting them together.