Since we work, we have to find time in the evenings to work on projects.
Slowly, the log walls are coming together. The front wall with the window and door need a bit more work for the interlocking logs to fit. Of course, we've been sanding everything as we fit them together.
Also, I need to glue on a few support beams for the front porch roof and second floor. We're pleased with the results this far.
Mainly dollhouses and miniatures in 1:12 scale, cross-stitching, my favorite dolls and toys, as well as other crafty projects.
Friday, April 6, 2012
Tuesday, April 3, 2012
Eric's Fort
Many, many years ago, I purchased the Shenandoah log cabin kit by Dura-Craft. I got it on clearance sometime around 1998. I started assembling it, and then things happened so I put it away and forgot about it. Over the course of a number of moves, there were a few casualties. Things fell apart, the chimney broke, I lost, then found, then lost again various pieces or the instructions.
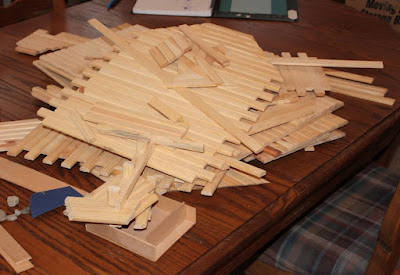
This past weekend I decided enough was enough. I told Eric I was going to build him a fort for his superheroes. I tore up the garage to find everything. I spread it on the dining table to see what I had to work with. I told myself I had to get it done in time for Eric's birthday, which was only 30 days away.
See? Instructions! Everything I needed to find, I found.
Then, I started working on it. I had to identify which broken pieces went where and which wall or roof pieces was which. It really wasn't that difficult. I started to fit the walls together, which meant sand and trim where the logs interlocked. I was using a little piece of sandpaper, sitting at the table.
Then Justin said, why don't you use the power sander?
Power sander? Good idea!
Before long, Justin was showing me what to do, how to sand it just so, and lending a hand when I got tired.
It's funny how my hobbies and interests take over so even Justin was excited about getting the fort done.We talked about stain, adding "chinking", what kind of stone to use to cover the chimney, and finishing it with a final clear coat.
We got to the point of dry-fitting together both the left and right side wall assemblies with the bottom floor. We got a lot done in one lazy Sunday. Progress is so exciting!
For the rest of this week, I will continue re-gluing the front wall and roof sections, sanding, and fitting them together.
Subscribe to:
Comments (Atom)


